Lookbook and shop the look
Tambour has two sections for styled photos. The Lookbook shows up to 10 photos, one at a time, each with a caption and links to two products. Shop the look shows one photo with up to five products beside it, and shoppers add them all to the cart with one button.
Add looks to the Lookbook
Section titled “Add looks to the Lookbook”Each photo is a Look block with an Image, a Caption, a Product and a Second product. The section starts with three looks.
- In the theme editor, click Add section and choose Lookbook.
- Select the first Look and pick its Image.
- Write a Caption, such as “The Long Coat in black wool”.
- Pick a Product and, if the photo shows a second one, a Second product.
- Repeat for the other looks, then click Save.
The first look stands wide on the left. The others sit to its right as narrow slices, numbered by look. The open look has no slice of its own, so with three looks the slices read 02 and 03. The row holds eight slices on a desktop and scrolls sideways when there are more. Under the photo, the shopper sees “Look 01”, your caption and a link for each product, such as “Shop the Field Coat, $340”. The links go to the product pages. The Lookbook has no add to cart button; to let shoppers add the products in a photo, use Shop the look.
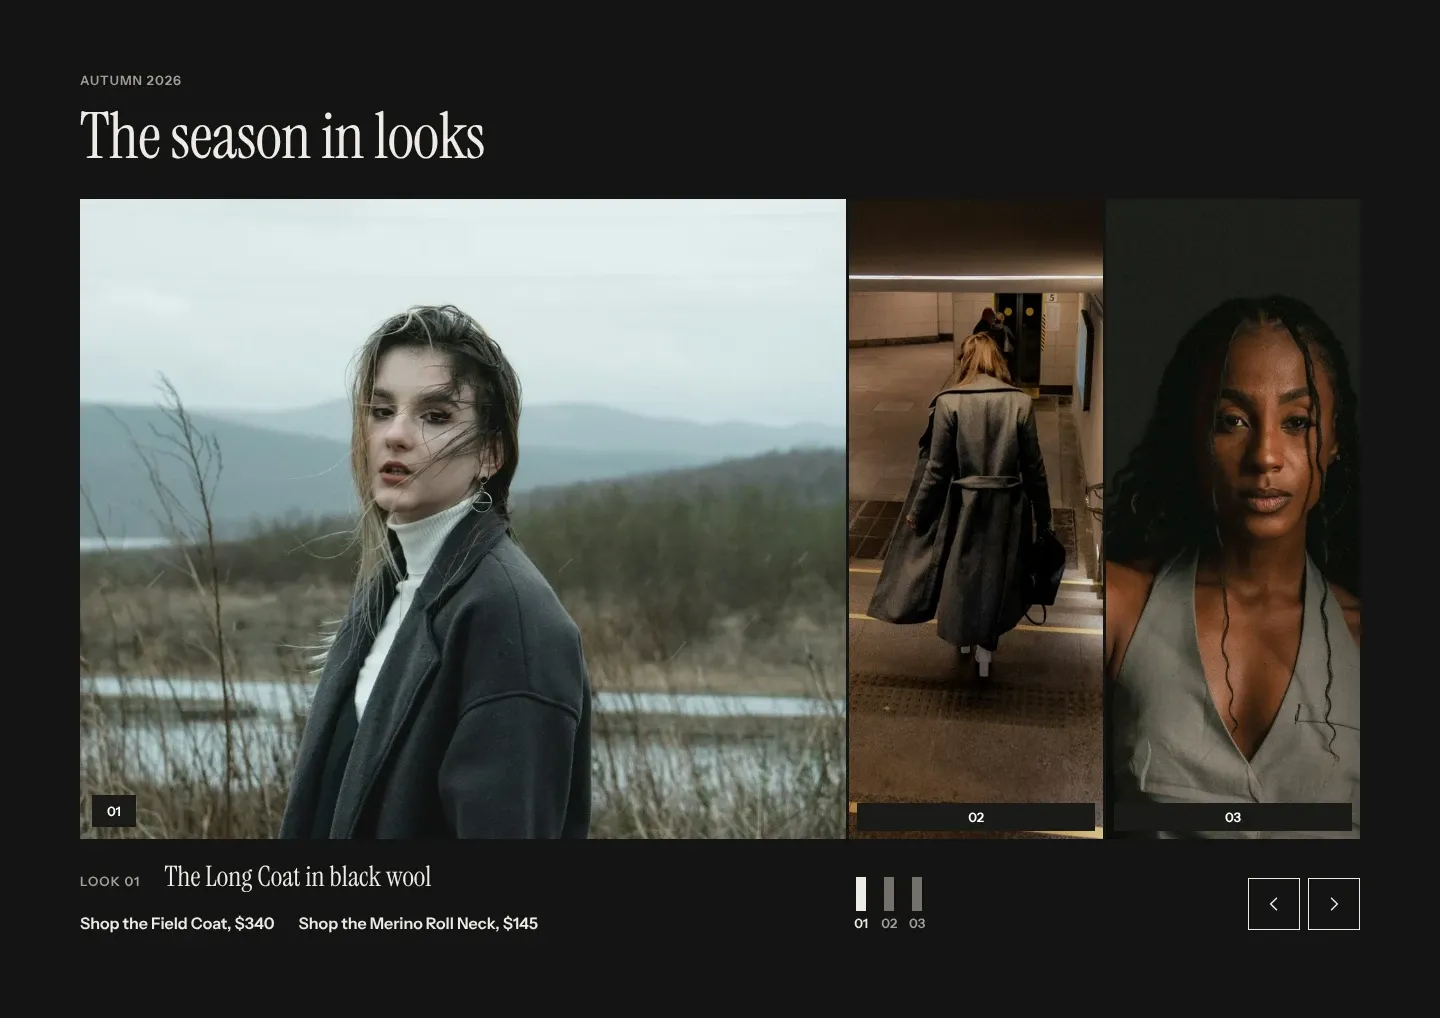
Shoppers change the look by clicking a slice, a numbered marker or the arrows. On a phone the slices sit in a short row under the photo and the markers are hidden.
The first look rests behind half-open louvers that turn open once 60% of the section is on screen. A look the shopper chooses comes up behind closed louvers that turn open. With Open louvers as sections scroll into view turned off in Theme settings > Animations, the first look shows open from the start. Shoppers whose device asks for reduced motion see the looks fade instead (see Accessibility and reduced motion).
Set up Shop the look
Section titled “Set up Shop the look”Shop the look lays thin vertical lines over the photo, cutting it into slats. You place each product by its slats, and a tag with the product’s name sits at the foot of those slats.
- Click Add section and choose Shop the look.
- Pick the Image.
- Set Number of slats, from 8 to 16. The default is 12.
- Select a Piece block and pick its Product.
- Set First slat to the slat where the product starts, counting from the left of the photo.
- Set Slats wide to how many slats the product covers.
- Repeat for each piece, up to five, then click Save.
A piece that runs past the last slat stops at the edge of the photo. Two pieces can share a slat; the later piece’s tag drops below the earlier one so both names stay readable.
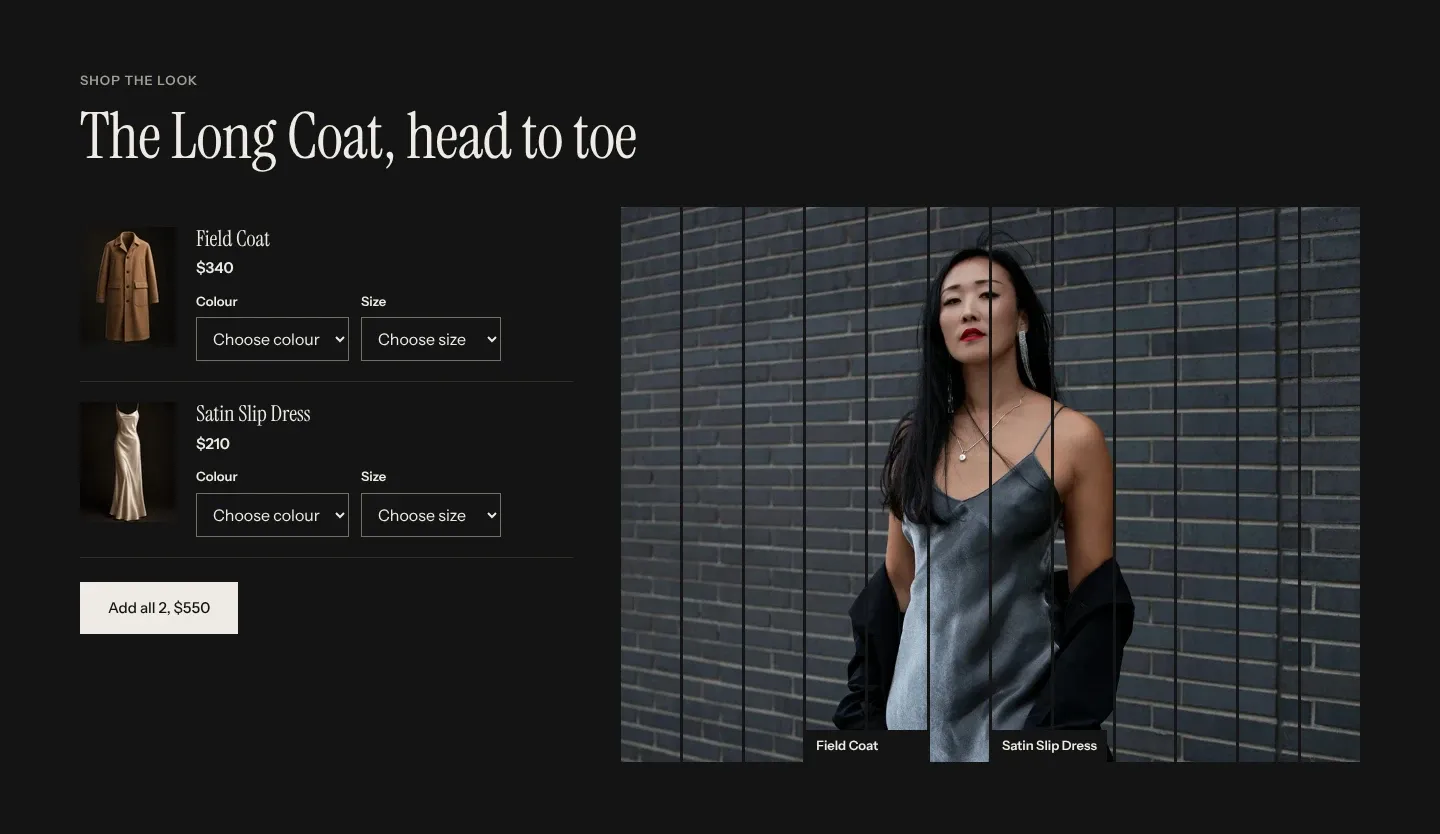
A common mistake is changing Number of slats after placing the pieces. First slat and Slats wide count slats, so every tag moves to a different part of the photo. Settle the number of slats first, then place the pieces.
How shoppers add a look to the cart
Section titled “How shoppers add a look to the cart”Each piece gets a row beside the photo with its photo, title and price. A product with more than one variant shows a menu per option, such as “Choose size”. Sizes and colors with nothing in stock are grayed out. A sold-out product shows “Sold out” and is left out of the button.
The button reads “Add all 2, $550”, or “Add it, $210” when one piece is available. The total adds up the lowest price of each piece, the same “From” price its row shows. One click adds one of each piece to the cart. If a row still needs a choice, nothing is added: the row shows an error such as “Choose size” and its empty menu takes the focus.
After the pieces are added, the shopper sees what Cart type in Theme settings > Cart sets: the cart drawer opens, the cart notification shows, or the cart page loads.
Choose photos that crop well
Section titled “Choose photos that crop well”Both sections crop the photo to fit, and the crop changes with the screen.
- On a screen 750px or wider, a look is about 60% of the page wide and 640px tall, close to 4:3 landscape, and the slices beside it crop the same photo to narrow strips. On a phone the look is 4:5, taller than wide.
- On a screen 990px or wider, Shop the look shows its photo at 4:3, or as tall as the product list beside it when the list is taller, and never under 480px. Below 990px it sits above the list at 4:5.
- The theme loads Lookbook photos up to 2000px wide and Shop the look photos up to 1800px wide. A larger upload is not shown any sharper, so 2000px wide is enough for both.
Keep the person or product in the middle third of the photo, with room around it, and set a focal point on the face or the product in Shopify’s image editor (Shopify’s guide). Tambour moves the photo so the focal point falls in the middle of a slat, not on a line between two.
Common questions
Section titled “Common questions”Why does a tag on the photo say “Piece 1”?
Section titled “Why does a tag on the photo say “Piece 1”?”The Piece has no Product picked yet. Pick one and the tag shows the product’s name.
Why is there no Add all button?
Section titled “Why is there no Add all button?”None of the pieces has a product in stock. The button counts only products a shopper can buy.
Why do the tags cover a different part of the photo on my phone?
Section titled “Why do the tags cover a different part of the photo on my phone?”The photo is cropped to 4:5 on phones and 4:3 on a desktop, so each slat covers a different part of it. Check the section in the phone preview of the theme editor, and set the focal point on the product the tags point at.
Can a look in the Lookbook link to more than two products?
Section titled “Can a look in the Lookbook link to more than two products?”No. Use Shop the look for up to five.