Cart drawer and cart page
Pawsome has two carts: a drawer that slides in from the side of any page, and a full cart page. Both list the items, show the subtotal, and send shoppers to Shopify’s checkout.
Choose a cart type
Section titled “Choose a cart type”In the theme editor, open Theme settings > Cart and pick a Cart type:
- Drawer, the default, opens the cart over the current page. The cart icon in the header opens it.
- Page sends shoppers to the cart page. Adding a product from a product page or a product card also goes to the cart page.
The cart page stays available with either type, at your store’s /cart address. With Drawer, the drawer never opens on the cart page itself.
The cart drawer
Section titled “The cart drawer”Select the Cart drawer section in the theme editor to open the drawer while you work on it.
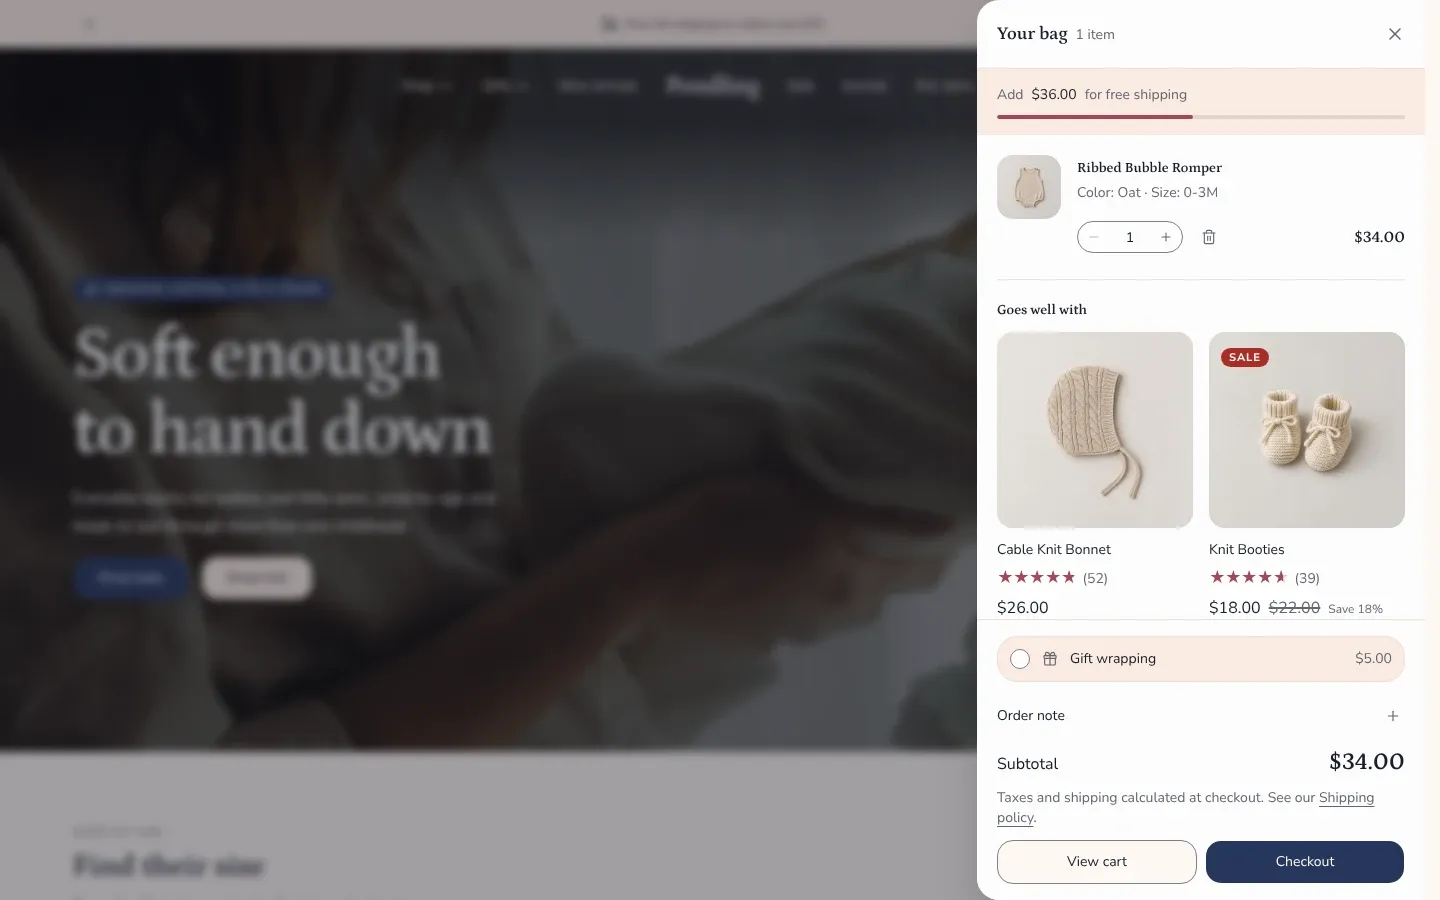
- Open the drawer after adding to cart is on by default. Turn it off to keep shoppers on the page after they add a product. The cart count in the header still updates.
- Width chooses Small, Medium or Large.
- Show free shipping bar shows the progress bar described below.
- The Empty cart settings set the heading, text and button shown when the cart is empty. Collections adds links to collections under the button.
The drawer holds blocks under the item list. By default they are Gift wrap, Order note, Subtotal, Terms agreement and Checkout buttons. The drawer also accepts Custom Liquid and app blocks. See the Cart drawer reference.
The cart page
Section titled “The cart page”The cart page uses the Cart section. Below it, the presets add a product section: Featured collection, or Recently viewed in Socket. Open the cart page from the page menu at the top of the theme editor.
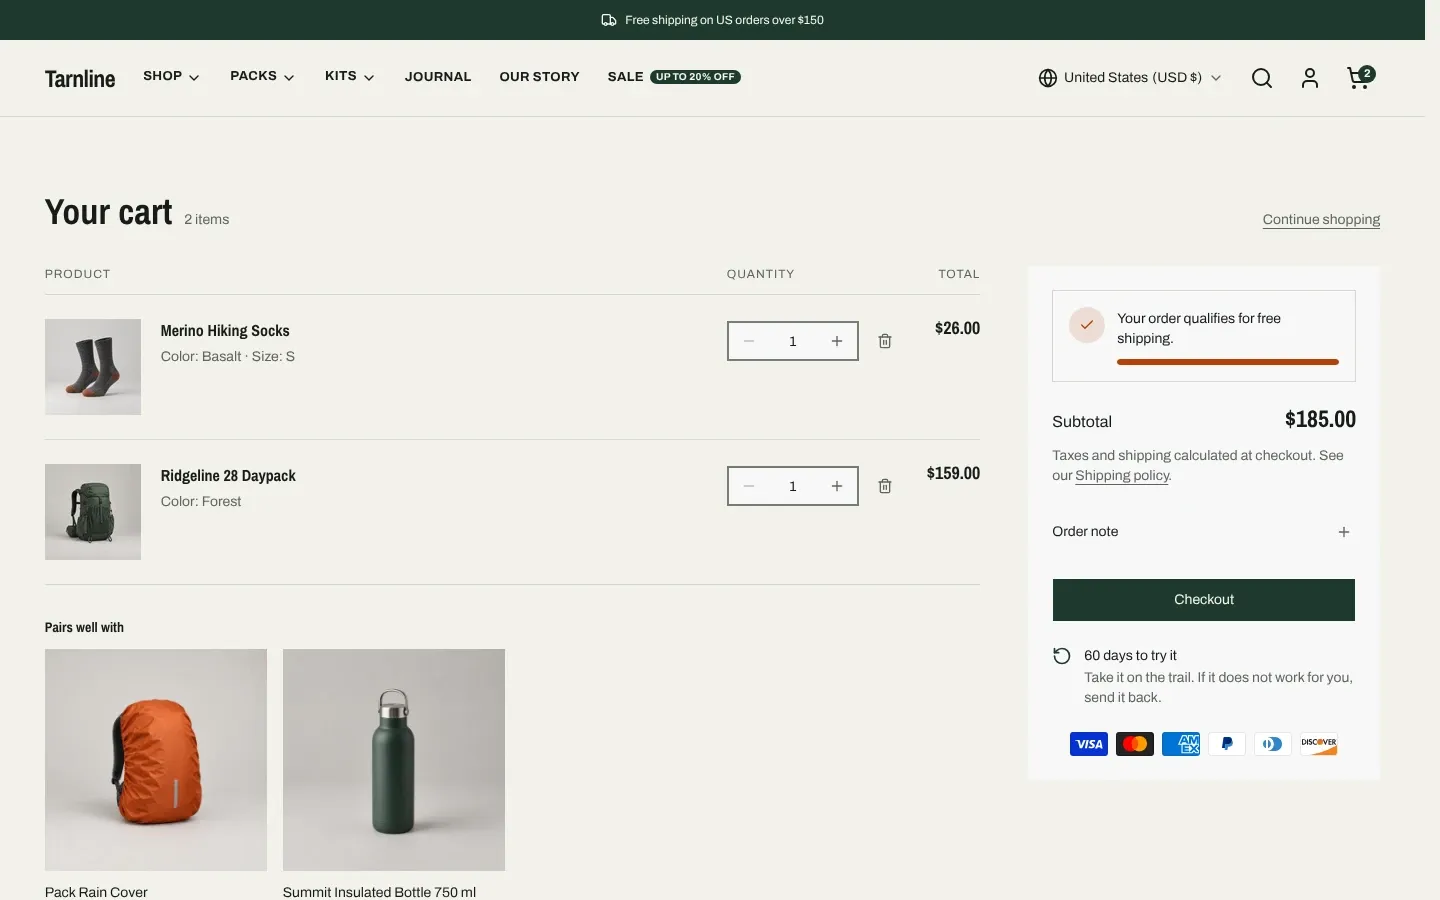
The Cart section shows the items on one side and a summary column on the other. Its settings cover the item list, such as Show vendor and Aspect ratio, and the look of the summary. The summary holds the same blocks as the drawer, plus Payment icons, Trust badge and Text. See the Cart reference.
Show shipping estimator adds a panel where shoppers enter an address and see the shipping rates Shopify offers for it. The panel shows only when the cart holds an item that needs shipping.
What each item shows
Section titled “What each item shows”Each item shows its image, title, variant, price, a quantity stepper and a remove link. When they apply, it also shows:
- The subscription plan, for items bought with a selling plan
- Line item properties added by an app or a form, except properties whose names start with an underscore
- The unit price, such as a price per 100 g
- Discounts applied to that item, by name
- An info icon that lists the product’s disclosures, for disclosures set to show in the cart
Gift wrap
Section titled “Gift wrap”The Gift wrap block shows a row that shoppers select to add gift wrap to their order. Selecting it again removes it. The row shows the product’s title and price, and the gift wrap appears in the cart as an item of its own.
Gift wrap is a regular product in your store:
- From your Shopify admin, create a product, for example “Gift wrapping”, with a price.
- Give it no options, so it has one variant.
- Make it available on your Online Store. If Shopify tracks its inventory, keep it in stock.
- In the theme editor, click the Gift wrap block and choose the product under Product.
The row adds one gift wrap per order, whatever the number of items. It shows only when the product has exactly one variant and can be bought. A product with several variants, a sold-out product or no product leaves the row hidden on your store.
Cart upsell
Section titled “Cart upsell”Below the items, both carts show a Cart upsell. It is a fixed block in both the Cart drawer and the Cart section. You can’t remove it or move it, and each section’s upsell has its own settings. You choose where its products come from with Source:
- Automatic recommendations shows the complementary products you picked in the Search & Discovery app for one of the products in the cart. Shopify does not pick complementary products for you, so with no picks the upsell stays hidden. See Shopify’s guide to product recommendations.
- Selected products shows the products you choose under Products, skipping any already in the cart.
Shopify data Pawsome reads lists the other features that depend on data in your admin.
Products to show sets how many appear, up to four. The heading defaults to “Pairs well with”. In the theme editor, the upsell shows sample product cards when Source is Automatic recommendations, and when Selected products has nothing to show yet. Check the automatic upsell on your live store. To show no upsell in one cart, hide that section’s Cart upsell block in the sidebar.
Free shipping bar
Section titled “Free shipping bar”The free shipping bar tells shoppers how much more they need to spend for free shipping, and confirms when they reach it.
- In Theme settings > Cart, enter the amount in Free shipping threshold, in your store’s currency.
- Make sure Show free shipping bar is on in the Cart drawer section and in the Cart section.
The bar only displays progress. It does not change what shipping costs at checkout. Set up the free shipping rate itself in Shopify, at the same amount. See Shopify’s guide to shipping rates.
The bar counts only items that need shipping, after order discounts. It hides when the threshold is 0, when nothing in the cart needs shipping, and when a shopper browses in a currency other than your store’s, because the threshold has no converted amount.
Discounts
Section titled “Discounts”The Subtotal block lists each order discount by name with its amount. When items have their own discounts, a You save row shows their total. Each item also lists its own discounts.
The cart has no field for discount codes. Shoppers enter codes at checkout.
Order note
Section titled “Order note”The Order note block adds a text field for instructions to you. It appears on your store only when Show order note is on in Theme settings > Cart. Character limit caps the length, and Show as a collapsible row hides the field until a shopper opens it.
Terms agreement
Section titled “Terms agreement”The Terms agreement block adds a checkbox shoppers must check before checkout.
- In Theme settings > Cart, turn on Require terms agreement.
- Choose a Terms page to link from the checkbox label. Without one, the label reads “I agree to the terms and conditions” with no link.
Until the box is checked, the checkout button shows an error instead of going to checkout, and the accelerated checkout buttons in the cart are disabled.
The checkbox lives in the cart only. Dynamic checkout buttons on product pages and in quick view skip the cart, so shoppers using them never see it. If every order must agree to your terms, turn off Show dynamic checkout buttons in the Buy buttons block.
Checkout buttons
Section titled “Checkout buttons”The Checkout buttons block always shows a checkout button. Show view cart link adds a button to the cart page beside it, which suits the drawer. On the cart page, leave it off, since it would link to the page itself.
Under the checkout button, the block shows Shopify’s accelerated checkout buttons, such as Shop Pay or PayPal, when your payment settings offer them. Shopify decides which buttons show. See Shopify’s guide to accelerated checkout buttons.
Subtotal and payment icons
Section titled “Subtotal and payment icons”The Subtotal block shows the subtotal and a line on taxes, duties and shipping that follows your store’s tax settings. When you have a shipping policy, the line links to it.
On the cart page, the Payment icons block shows an icon for each payment method enabled on your store. The Trust badge block shows an icon with a heading and text, such as a note about secure checkout.