Gift cards
A gift card in Shopify is a special product. You create it in Shopify admin, and Pawsome shows it like any other product, with a form for sending it as a gift. After purchase, Shopify emails a link to the gift card page, which Pawsome also designs.
Create a gift card product
Section titled “Create a gift card product”- In Shopify admin, go to Products > Gift cards.
- Click Add a gift card product.
- Add a title, description and images, as you would for a product.
- Set the denominations. Each one becomes a value the shopper can pick on the product page.
- Click Save gift card product.
Shoppers pick from your denominations. Shopify does not let them type a custom amount on the storefront. See Shopify’s guide to gift card products.
Every preset ships a gift-card product template, which leaves out blocks that don’t apply to a gift card, such as pickup availability and inventory status. To use it, open the gift card product in Shopify admin, pick gift-card under Theme template, and click Save. The denominations show in the Variant picker block.
The recipient form
Section titled “The recipient form”On a gift card product, the Buy buttons block adds a Send as a gift checkbox above the add to cart button. There is no setting for it. It shows on every gift card product, wherever the block is: the product page, the Featured product section and quick view.
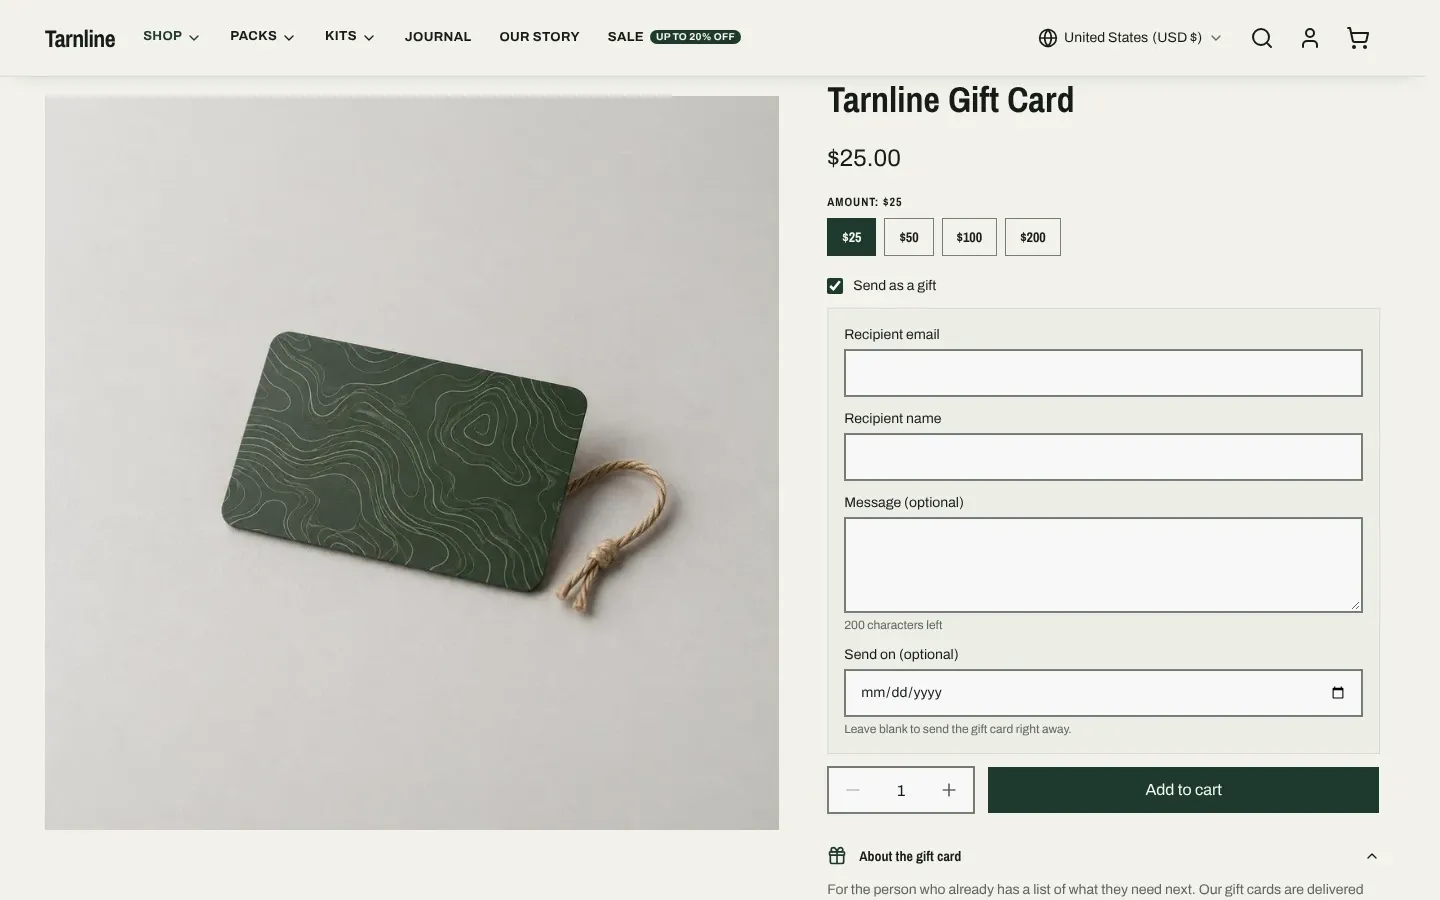
When the shopper checks the box, these fields open:
- Recipient email
- Recipient name (optional)
- Message (optional), up to 200 characters, with a live count of characters left
- Send on (optional), a date. Left blank, the gift card goes out right away.
Shopify then emails the gift card to the recipient, with the name and message, and sends the buyer a receipt. A scheduled gift card goes out on the chosen date. If the shopper leaves the box unchecked, the gift card goes to the buyer. See Shopify’s guide to gift card recipients for the emails and send times.
The gift card page
Section titled “The gift card page”The email that delivers a gift card links to its gift card page. Shopify hosts that page on its checkout domain, and Pawsome supplies the design. It has no header or footer, and uses your theme colors and fonts.
The page shows:
- your logo from Theme settings > Brand > Logo, or your store name if you have not set a logo
- the recipient’s name and message, when the buyer added them
- the balance, and the expiry date if the card has one
- the gift card code to type at checkout
- a QR code of the gift card, for scanning at checkout
- an Add to Apple Wallet button, when Shopify offers a wallet pass for the card
- a Print gift card button and a Continue shopping link back to your store
A gift card that has expired, has no balance left or has been turned off shows a notice instead of the code, the QR code and the wallet button. The balance stays visible, grayed out.
Preview the gift card page
Section titled “Preview the gift card page”- Go to Online Store > Themes > Customize.
- Open the page selector at the top of the editor.
- Under Templates, click Others, then Gift card.
The page has no sections, so there is nothing to add or move. To check a real card, go to Products > Gift cards, click Create gift card, enter your own email under Customer, save, then click Send gift card > Send email and open the link in the email. A card issued this way is real store credit, so give it a small value or turn it off afterward.
Change the text
Section titled “Change the text”The page has no editor settings. Its wording, such as “Use this code at checkout to redeem your gift card.”, lives in the theme’s default content. Go to Online Store > Themes, open the three-dot menu next to the theme, click Edit default theme content, then search for “gift card”.
The emails that deliver gift cards are Shopify notifications, not part of the theme. See Shopify’s guide to gift card pages and notifications.